Thursday 24 December 2015

Xmas = BBQ

Yes, Northern Hemisphere types, Christmas is all about the beach and BBQ's, not that cold, wet, slushy stuff you seem so fond of.

Accordingly, we have a new BBQ. The trouble was, I couldn't find anywhere to mount it that wouldn't get in the way while sailing and was otherwise practical. So I have made up a mount that screws into one of the big pad-eyes on the aft deck and braces off a stanchion; we just screw it in and drop the BBQ on top, and when we have finished the BBQ gets bagged and dropped into the lazarette. OK, I still have to sort out the bag part...

With regards my earlier comments about Xmas time, please ignore the rain-soaked deck.

Merry Christmas everyone!

Sunday 6 December 2015

Galley

I finished off the last of the trim bits in the galley the other week. I think it has come together well, and it's great having a proper oven. After we've been away these Christmas holidays I'll see if I still think it was a great idea to go for the electric oven.


UPDATE: Yes, it was a great idea going with the electric oven!

More Toys

The forestay is all back together. But now the Xmas madness descends, and trying to arrange to get out sailing is looking tougher and tougher to do. Oh bloody hell...

Anyway, left alone this weekend while the family does end-of-year school/sports/clubs/whatever stuff, I decided to upgrade the nav station.

When we first got Kamalii, I vowed I would not load her up with electronic toys and would keep her simple and to the basic requirements. Yeah, right. Having installed a chart-plotting system on the port side nav station a long time back, I had left the starboard side as it was: a nice array of vintage CRTs, comprising a non-functional radar, control panel for the now non-existent old autopilot, and a working chartplotter so old and primitive on more than one occasion while having drinks we fired it up and had a good laugh - a bit like breaking out an old Atari 2600 games console, and every bit as shit.

So I have ripped out all the old gear, made up a new fascia panel, and will be mounting a matching LCD display on it so that I have twin screens from my nav system. Why? Because I can. And short of turning the area into a storage locker there is not much else I can think of to do with the space.

Pulling out the old gear.
Removing old cables, adding new ones...
Take them to an antique dealer?

New fascia, two more coats to go...

This is the current port side nav station. I'm putting an identical screen on the other side, which can mirror this one or be operated completely independently.

Tuesday 1 December 2015

A large hole in the water into which you pour money...

Sailing. That thing you dream of doing as you sit on the dock, covered in sweat and filth, ruminating on the size of the latest pile of money you have had to pour into the "love of your life"...

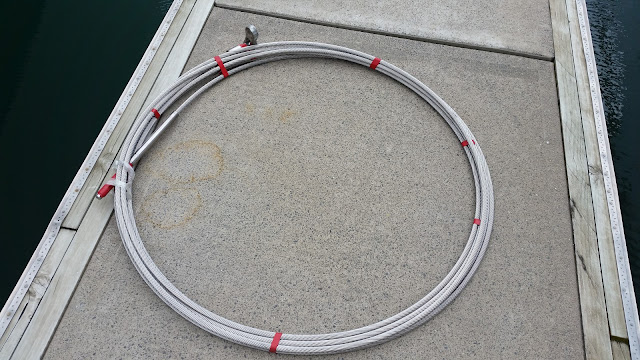
So I got a new forestay made. Couldn't get any 5/8" cable, so up-sized slightly to 16mm - hey, the beyond-stupidly-over-built approach has served Kamalii well all these years, so why stop now? Then, of course, it turns out all our turnbuckles are 14 threads-per-inch, and we could only get 1" studs in 12tpi, so we had to have the stud custom made. Oh, and did I mention that a forestay that size is really bloody expensive?!

24m of brand new forestay. Oooh, so shiny...

I'll admit that, disregarding the cost, it is a nice feeling knowing that my forestay is no longer of questionable provenance.

The furler needed some TLC. I had to replace one section of the foil (fortunately Kamalii came with a spare) and I replaced one of the bushes in the swivel, which has made a huge difference in how easy it travels along the foil. With the new forestay we were able to remove the extra toggle at the stem that had been inserted when the old forestay was cut short, and as a result the furler unit now sits 95mm lower which has resulted in a much better fairlead angle for the jib halyard.

Putting it all back together.

I had to machine out a seized grub screw on the lower bearing unit, sort out the top bearing retainer, etc, etc....and two weeks goes by. Anyway, on the weekend we hauled her back up, and it all looks good. I am waiting on one more part to finish off reassembling the drum unit, and then we will haul the jib and see how she goes. Fingers crossed. I really, really, really want to go sailing...


Sunday 15 November 2015

Foiled Again...

So I made the decision to drop the forestay off - things were just too iffy with the furler. With the help of our friends from The Pearl we managed to get it down without any dramas, and once on the dock it quickly became evident what the source of the problems were.

We had one seriously bent join between extrusion sections, plus a number of extrusions had become flared at their ends, swelling out in one dimension by about 0.5mm. This was enough to jam up the bushes in the swivel unit and stop it from coming down.

We have completely dissassembled the furler and checked each and every component. The good news is that there is almost no fizzing of the aluminium parts and overall it seems in sound condition. The problems seem to be a combination of residual deformation from a screw-up made in the USA when the mast was pulled that resulted in damage to the top of the forestay and furler unit, and me sailing on the wind too bloody hard with a heavily furled jib.

The damage in the USA was repaired before I got there, but now upon careful inspection I can see that one of the joiners was bent out of shape, and the head of the furler had not been reassembled properly. It seems heavy loading on the foil without even luff pressure due to our jib not being flat enough to properly set when heavily reefed has also caused point loading that has further deformed the fittings - indicated by the fact that all the worst of it is located right where the head of the sail generally sits when we reef in heavy weather. Live and learn.

The good news is that Kamalii came with a spare section of extrusion that I can use to replace the damaged one, and it appears the only parts I have to buy are a replacement joiner/bearing holder and the bearing retainer for the head.

Since we have it all down and apart I will also fit a new forestay - the existing one definitely appears to be a lot older than I was lead to believe, plus they cut it 100mm too short when they repaired it previously, adding in an extra toggle at the stem to compensate. So, more time, no sailing... but better safe than sorry.

If you look carefully at the far end you can see the sharp kink in the foil from the bent joiner.

Saturday 14 November 2015

Bloody Boats...

I am feeling a bit "over" boats at the moment.

I had hoped to spend a day sailing this weekend, having picked up the jib from the sailmakers who gave it some TLC. Unfortunately, when we dropped the jib we found the top swivel of the self-furler was binding up at the joints of the foil sections. I'm not sure exactly what has gone on, but it seems most of the foil sections are now slightly misaligned, and it is virtually impossible to raise or lower the jib . Basically, we need to drop the forestay off so we can go right over the furler unit. Scratch sailing this weekend.

Sunday 8 November 2015

A Quick Jaunt

We took Kamalii out for a spin this afternoon, just an hour out under motor to make sure all is good. The engine ran sweet, and we gave her a good hard run with the boat clipping along at around 9.5 knots, so some confidence at last we have everything nailed. The jib is at the sail-makers getting spruced up for the coming season, and I hope next weekend we will head out for a proper sail - wahoo!

Sunday 25 October 2015

K.I.S.S.

I did it. The primary fuel filter set-up was so complicated that it was far more likely to keep causing me problems than to ever save me some grief, so I got rid of the second filter unit. And for good measure I have then moved the two genset primary filter units up with the main engine filter so they are no longer down almost in the bilge and everything is conveniently together.

From this:


  To this:


Still have to tidy up, and then paint everything of course, but much tidier and simpler.

It's Labour weekend holiday, and we are not sailing. I consoled myself yesterday because the weather was crap; today it's fantastic. Oh well, a few more weeks and we should be ready to head out - so hanging out for it!

Saturday 24 October 2015

The Sound Of Not Silence

Now this is satisfying.


I have also isolated the vacuum leak in the fuel lines down to the primary fuel filter assembly - no surprises there. The whole contraption is so complex and convoluted I am considering removing one of the filter units altogether, which will greatly simplify the plumbing. The chances of me ever having need of a hot-swap of filters while running the engine is pretty much zero provided I change the filter regularly.

Sunday 18 October 2015

It's Alive!

Ran the engine for two hours last night. All seems good. (Puhleeeeze be good...)

On the assumption (I will not declare victory yet) that the oil cooler is now all good, now I have the joyous task of tracking down the air leak in the fuel line. But hey, at least we're making progress.

Wednesday 14 October 2015

Update

Feeling a little (lot) anxious. Summer is almost upon us and the boat is nowhere near ready. Gotta prioritise those jobs...

The gasket makers have finished the new oil cooler gaskets, so you can guess what this weekend's job will be.

The pressure relief valve on the hot water cylinder packed up and started spewing water, so I have now replaced it and also plumbed the discharge so it goes back into the water tanks instead of the bilge.

Sharon has sewn up a cushion that was missing from the starboard cabin, which is great, but now there's just the small matter of an entire cockpit's worth of squabs to do before summer...hmm.

Besides that, I need to:

  • Finish off the galley oven installation (bench and varnish).
  • Varnish up all the running rigging blocks.
  • Get the jib down - the self-furler swivel is jammed up.
  • Service all the winches etc
And of course, once the engine is running again I still have to track down the air leak in the fuel lines...


Sunday 4 October 2015

Like water through an oil cooler, these are the days of our lives...

Having once more gone through the process of assembling the oil cooler, fitting it, and then ending up with an oil sump full of water again, we took it apart and had the cores checked again. They did find one more very small leak in the core that was not repaired, and fixed that, but basically we could not believe that was responsible for all the water pissing straight into the sump.

So, for the fourth time, today we reassembled everything, crossed our fingers, and filled the cooling system again. We could actually hear the water piddling into the sump as we filled. (weeps....)

Now in a zombie-like state, I stripped the cooler back off again, and carefully prised everything off. We had figured by now there had to be a fault with the seal of the gasket that was allowing water to flow between the oil side and the water side. And sure enough....it's the wrong bloody gasket!!!

The Cummins V8-300 has oil transfer cases on both sides, and in the 300M (marine) version one case is replaced with an oil cooler. The gaskets for each side are identical...almost. It turns out the gasket we had from the set was for the transfer case side, not the oil cooler. The correct gasket is nowhere to be found.

Gasket in place after removing oil cooler. Notice in the right-hand end the elongated hole at top - which is water - and the smaller hole underneath it - which is oil. Notice the absence of gasket between them. Duh.

So, the big question is this: Am I a complete f***king moron? I will answer with a qualified "maybe". The cores leaked, that was the original source of the problem, but three more strip-and-reassembles to find the fault indicates that perhaps I'm not the most observant mechanic in the bay.

And the great news, according to the Cummins website the gasket is no longer available. Off to the gasket makers we go...

Sunday 27 September 2015

Summer is coming, not long before the old girl gets unwrapped.


Wahoo, decent weather is starting to arrive. So I took the opportunity to paint the liners.

Man I want to go sailing. Starting to feel the pressure to get that engine sorted out...


Sunday 20 September 2015

Oil Cooler (again)

We pulled the oil cooler apart again yesterday. The o-ring seals were perfect (yay, we didn't screw up) which means the water was getting in through the cores. So much for that repair! Will be throwing them back at the shop that "fixed" them to try again, and if that's no good then will have to consider replacing the whole unit with a new external cooler.

Let There Be LightI

I rather like the vintage 1950's light fittings on Kamalii, but unfortunately we were short a couple of shades so I was faced with having to install some different units in the master cabin. Instead I decided to spend a silly amount of money having new exact replicas of the shades manufactured.


All the coach-roof liners for the master cabin are cut, but the weather forecast for the next week or so is pretty crappy so I won't be getting them out to epoxy and paint any time soon. Plenty of other things to keep me entertained. I just want that bloody engine 100% sorted for summer!

Thursday 17 September 2015

Oil Cooler, How I Curse Ye...

And in case anyone is wondering, the main engine oil cooler has been completely removed again and I will rebuild it from scratch again off the boat in a workshop and have it pressure tested before I re-fit it. And if it does not seal this time I will seriously consider ditching it for a modern after-market external unit not designed by a complete moron.

Aft Cabin

Continuing the theme of moving aft, now that the heads are more or less done I have started on the master cabin. First up, new coach-roof liners. Half of the liners were missing, and what was there was a bit random, so I have junked the lot and started again.


Test fitting new liner panels.
Now I have to epoxy saturate everything before painting. Then strip and re-varnish all the teak battens. Might as well varnish and repaint the whole cabin while I'm at it...

Middle Finger Gesture

Had a wee mishap while cutting up plywood for head-liners outside in the wind. The wind caught a piece of ply I was holding...now I get to wear this for 4-6 weeks.


Saturday 5 September 2015

Port Side Head Completed (Almost)


When not doing my head in trying to sort out the engine oil cooler I have been working on the port side head.

The shower required a much more aggressive prep than the starboard side head, but it has come up well.

All done now, bar some trim pieces I will have to make up. I still can't believe they painted that teak grey...

There is a massive space behind the outboard side of the shower where all the Vacuflush pumps are for the heads, so I'm going to try and come up with a way of creating usable storage space while still being able to easily remove everything to get to the pumps.


Hey, Europe!

Did you hear the scream...?

Sunday 30 August 2015

Engine Progress

The engine is back together. It was not fun. Letting sealant cure etc, and will fire it up some time this week.

Those of you following this blog from Europe, listen out during the week. If you hear a distant scream of rage, that is me, and means the oil cooler is still not fixed.

Sunday 23 August 2015

My Kitchen Rules

Still don't have all the parts I need to reassemble the engine, so this weekend I decided to go ahead and rip out the old stove and install the new one.

Pulling out the old stove was easy enough, and it didn't take long to dissemble the cabinetry and cut things up to suit the new hob and oven, which are somewhat larger. I have kept gas hobs, but since we have two big gensets that have to be run anyway I decided to go for an electric fan oven.

Regulations require a separate 16 amp circuit for the oven, but fortunately I did not have to run any new cables. Behind the galley bulkhead was a 230V feed on its own circuit for a large deck wash pump that was never installed. This was operated by a big double-pole relay switched through the windlass control box - I think I get what they were aiming for, but not really sure why...  Anyway, I appropriated the relay and 230V circuit, and added a 24VDC switch above the hobs that engages the relay. This means the oven is now on it's own AC circuit and can be independently switched off (also required by the regs) but I didn't have to run cable and install a big double-pole AC switch in the bulkhead. I also routed the DC supply for the gas solenoid control unit through the same master switch, so now if I switch the oven it not only cuts all power to the oven and hob but also shuts off the gas supply.

I've hooked everything up and had the hobs going, but still have work to do on the woodwork and stainless bench-top. I'm hoping I'll get the bulk of it done before the end of the week, and then I can get the gas man around to sign it off so it's all nice and legal.

(And Yes, I know the stove is not gimballed. Kamalii is so stable it really is not an issue except in the heaviest weather.)


The original stove. Not the sexiest.

Stove removed.

Internal frames removed and benchtop cut to fit hob.

Cooking porridge...

One small oversight - the oven is too large to fit through the doorway into the galley. I had to strip off the outer casing and take off the fan assembly you can see on top in this photo, in order to squeeze it through.

Got it through...by the skin of its teeth.
Not done yet, but starting to look good.

Friday 14 August 2015

Engine Update

The results of pressure testing the oil cooler cores are in....and one of them has two leaking tubes. So there we go.

They are being repaired now, and if and when Cummin's ever gets the o-rings and gaskets in that I ordered we can throw the baby back together. Then it will be back onto the fuel system...

Sunday 9 August 2015

Shit Storm

And now for an amusing anecdote...

While I was working on the port side head yesterday one of our delightful children blocked the starboard side head. This was followed by second child filling the bowl with an effort I would be impressed to produce. And so now someone had to clear it all out...

This is the sort of job that invariably lands on me, but this time I gave an emphatic "not me". After most of the day had passed, letting the contents of the bowl mature nicely, the ladies of the ship finally manned up and got stuck in. Our little hero Isi gloved up and emptied the bowl out into a bucket, and then Sharon did the plunger thing, with positive results.

At this point it was the least I could do to take the bucket full of crap up to the toilet block for disposal. By now it was dark outside, pitch-black, wet and freezing cold. Even stepping off the boat onto the dock was a difficult act, it being so incredibly dark, and I took great pains to ensure nothing got spilled. Safely on the pier I congratulated myself and set off down the dock.

Flash-back....

Earlier in the day, my lovely family return from shopping, bringing a trolley full of groceries down to the boat. Having unloaded it begins to rain hard, so all dash quickly inside, leaving the trolley lying across the pier...

...and now you can guess what comes next.

Wearing only shorts and a t-shirt I plough into the trolley at full speed. Smashing my shin and tearing up the skin, stubbing by big toe, and wrenching my back as I collapse, the bucket goes flying....upwards.

Sprawled across the trolley, I receive my manna from heaven.

Oh. My. God.

Now, as I type, I've decided I just don't want to talk about it anymore...

Aaah. The joys of living aboard.


Saturday 8 August 2015

Port Side Head

The parts I need to put the oil cooler back together wont arrive until next week, so I've started work on the port side head - just a repeat of the starboard side i.e. strip back all the gray paint from the teak and varnish up, and repaint the shower. For some bizarre reason the switch for the light in the port head is mounted in the headliner, while the switch on the wall was left disconnected, so I will take the opportunity to fix that up.

Paint stripped with heat gun. Not bad for a first pass.

Sunday 2 August 2015

Steady Progress

So let me first say that enthusiasm levels for pulling the engine apart have not been high, and many work-day evenings have started with the best of intentions and concluded with achieving nothing more than an empty bottle of wine.

So yesterday I bit the bullet and removed the oil cooler. To be able to access all the aft end bolts I had to unbolt the starter motor and slide it around, as you can't actually pull it off with the oil cooler in place unless you jack the engine clear of the bearers. By detaching the forward end-cap and transfer pipes from the cooler and leaving them in place on the engine I was able to pull it off with no swearing what so ever. A first.

Today I stripped the cores out and cleaned everything up. There are no obvious signs of leaks in the cores, but I will pressure test everything in any case, and I am fairly confident the leak was caused by the inner o-rings that seal the cores in the centre of the housing. Upon inspection these had clearly become very brittle with age, and as I had not replaced the inner O-ring when I did the aft core the first time (because it was logistically impossible with the oil cooler in place on the engine) I would say that the o-ring was damaged when the core was reinserted.
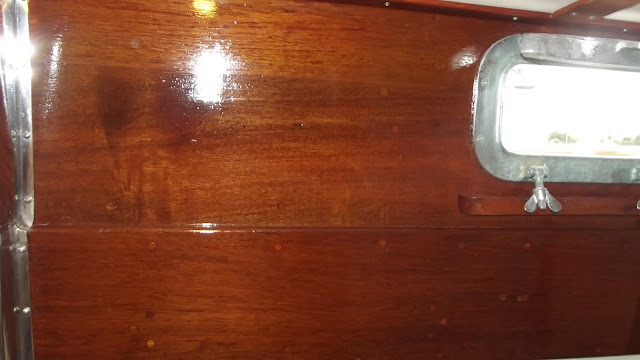
Exhaust manifold and oil cooler removed. Had to leave the forward cooler housing cap (lower right of photo) in place.
"Insert your caption of choice here."
 
Crap that I pulled out of the water-side of the cooler.

Cooler cores removed.

This week I will order in a full set of O-rings (I already have a full gasket set that came with the boat) and test the cores, and hopefully next weekend I can reassemble everything. Of course, now I will need to repaint everything, and so the fun just continues...

Sunday 26 July 2015

Huzzah!

I pulled the exhaust manifold off today. Or, rather, I undid all the bolts and fittings and allowed it to drop onto the floor. It's REALLY heavy. And it bounces. Onto your foot.

The great news is that someone previously has clearly suffered the horror of trying to remove the oil cooler in situ, and so when reassembling it very kindly left out one fixing bolt - the bolt that would require us to actually jack the engine to be able to remove the starter motor to in turn get to the bolt. Thank you, whoever you are.

I've had enough grease and grime for one weekend. I'll remove the oil cooler during the week and work out what needs to be done to it.

Saturday 25 July 2015

Bugger

Glum faces on Kamalii. Well, one glum face - mine.

We put the engine back together today, and it runs - yay!

Unfortunately, it appears the oil cooler needs more serious attention, as it pumped more oil into the cooling system. Possibly we have a leaking core. And removing the oil cooler from the engine is not a small amount of work...

Tomorrow I will pull the exhaust manifold off to get a better look at things and work out a game plan from there. Worst case scenario, we have to pull the whole front end off the engine. (Actually, the worst case scenario is that we have to pull the prop shaft, disassemble the shaft brake, undo all the engine mounts and jack the whole engine up so we can pull it off. But I'm not even entertaining those thoughts...)

#*@!! boats.

Tuesday 14 July 2015

...and I'm back

I've returned from three weeks overseas on business, but frustratingly found that the port side head had not stripped and re-varnished itself, nor had the shower painted itself. Bugger.

I have returned with the fuel injection pump. A huge thank you to Jim Fols of Jim Fols Engineering in Los Angeles, a top man and great source of advice.

Suffering from chronic Need-To-Do-A-Boat-Job-itis upon my return, I have finished a job I started months ago and then let sit; we now have a pressure-regulated dock-side water hookup so we don't have to keep refilling the water tanks (you try living aboard with three teenage daughters).

So, this weekend I will start in on reassembling the main engine. Should be fun...

Saturday 20 June 2015

Starboard Head Almost Done

The last few weeks I have been working on the starboard head. For some reason the teak cabin sides had been painted over with grey paint, as had other parts of trim, while the shower itself was looking very tired.

I stripped all the paint off and sanded back to bare teak, and have coated with Awlwood MA Gloss (aka Uroxsys) rather than standard varnish, as it should take the humidity a lot better. Also, even though it's f***ing expensive, the ability to lay up 3-4 coats in a day means the time savings compared to traditional varnish are worth it.

The shower took a lot of work. I sanded it back hard - the old base paint was actually fairly sound, but someone had slapped a coat of something low-grade over the top in the past. I also had to epoxy in a replacement section where an old vent fan had been. I've painted it with a white marine enamel, and it looks great and will hopefully be hard wearing. To work in the shower you have to close the head door, so I got to hot-box in the fumes and on the primer coat I managed to get myself seriously wasted and sick. Remember kids - Ventilation!

Under NZ Cat 1 (Offshore) regulations you have to have manual bilge pumps fitted. I have some but have been vacillating over where to fit them. The head still has the old through-hole in the wall from the old manual toilet pump, and it turned out the bilge pump fitted in nicely behind it. So now if it really hits the fan you can be seasick and pump out at the same time.

I'm heading off overseas on business for a few weeks, but when I get back I'll finish off the bilge pump and fitting new shelves into the lockers.

Before...

After.
Shower looking rather uninviting

Shower looking a lot more inviting.

Old vent hole in shower.
Ply epoxy saturated and fixed in


Note the pump behind the through-hole in the bulkhead. Still have to plumb it up and get a cover made.

Saturday 30 May 2015

Aft Companionway Done

We finished the aft companionway today. Cosmetically it wasn't too bad, but the fresh paint certainly smartens things up.

Pulling all the headliner out did help nail one minor intermittent leak; whenever we had torrential rain we would get drips of water coming down through the companionway headliner just above the stairs. I had not been able to see where it was getting in from the outside, but with the headliner out it became clear it had to be coming in under the old cockpit instrument locker. A poke with a screwdriver revealed that the caulking under the sill was full of holes which were plugged with black dirt, making it hard to see and letting water seep through when it got really wet. I've dug out all the old caulking and replaced it, so one more off the list.


New caulking in. Apart from the squabs, rebuilding the old instrument locker is the last job to do in the cockpit.

Saturday 23 May 2015

Wash, Rinse, Repeat...

One cabin down, onto the next section of work. We decided to do the aft companionway next, as it should be quick and simple. Let's remember those words, shall we...


Saturday 16 May 2015

One of these things is not like the other...

Just noticed this when we were doing the cabin. Can you spot it? 


I took them off and rotated them to the correct orientation. The bottom drawer has clearly been replaced at some point, and I figured they had just screwed up putting the handles back on. But as I switched them around I had a thought, and checked all the other handles. Every single one of them has been flipped, and the bottom drawer is the only one that has not been! Every handle on the boat is as per the upper drawers, so it seems that at some point someone decided to change the orientation of all the drawer handles on the boat. Go figure.

How Long is a Metric "So"...?

And the cabin is almost finished bang on time. I think you will agree (yes, You) that it is looking a lot better.


Still have to finish off some of the teak trim.

The panel by the outboard berth is temporary. It was all hacked up when they ran the exhaust through for the new gensets. I hope to get it all done this winter (or so...) 

So still some bits and pieces to do, but on the whole a massive improvement. We're now debating what to do next - probably the aft companionway.

Saturday 9 May 2015

Cabin Update

In a previous post I estimated that the repaint of the starboard cabin would take a week or so. I am getting much better at estimating the amount of time a job will take, and was bang on: the job is going to take exactly one "So".

A decision to strip and re-varnish the cabin side has delayed things, as has the subsequent decision to pull a porthole to check a suspected minor leak, which resulted in exterior paint getting cracked, meaning we now have to repaint the area....you get the idea.

Almost ready to prime...  The painting is actually now completed, it's the varnish that is holding things up.

Getting the stripped teak ready for varnishing. Pulled the fascia off for stripping, so have to re-plug all the fasteners. You can see the paintwork looks a lot better now.